Register Participants

Aug 27, 2021
 1337
1337
When you choose Register Participants from the menu, the system will present the Find Session page along with all of your active sessions. If you have many active sessions, you can enter search criteria to narrow the results list.
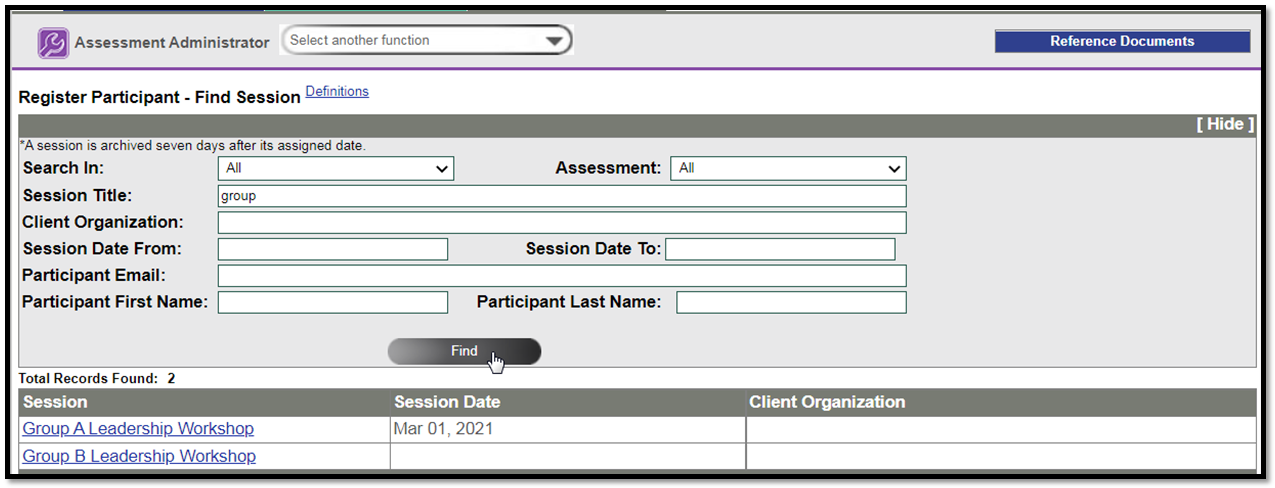
From the search results, select the desired program to access the registration page.

The registration pages has three sections, as depicted in the screenshot above:
- Session Header: Session level information and a current picture of your virtual inventory for the assessment are found at the top of the page.
- Registration Area: this is where you will enter new participants.
- Enter the participant’s Email Address first.
- If the system recognizes this email address (because of his/her previous CCL experience), the first and last name will be pre-populated. Pre-populated names cannot be edited by the Assessment Administrator.
- If the person is new to the system, you will enter the first and last name next.
- If the Job Title is not pre-populated (from previous a CCL experience), you may enter a Job Title on this web page. If it is pre-populated, you may change the value; this new value will be saved to the participant’s record for future use. This is an optional field.
- If the session was created with an Auto-email Invitation date, it will be pre-populated with each registration entered. You may change, add or remove an Auto-email Invitation date for each individual participant. If you would prefer to manually initiate invitations, you should leave this field blank.
- The Survey Completion date for the participant is pre-populated from the session header details. However, you can specify a different Survey Completion date for one or many participants in the same session.
- Enter the participant’s Email Address first.
- Registered Participants: This section of the page will show you the participants who have already been registered and/or invited to complete their surveys.
The are three actions you can take after entering the participants you wish to enter:
- Cancel: This will return you to the main Assessment Administrator home page. Any data entered in before cancelling will not be saved.
- Register: This will save the participant(s) into the session and move them to the Registered Participants section of the web page.
- If the Auto-email Invitation date is populated with a date that is in the past, the Register button will also trigger the system to send the invitation email.
- If the Auto-email Invitation date is not populated or is in the future, no invitation emails are generated at this time. Note that registration does not actually use your inventory; it only does a soft reserve of inventory. Your inventory snapshot in the upper corner of the web page will show an increase in Reserved and a decrease in Projected Available.
- Register & Send Invitations Now: This will save the participant(s) into the session and move them to the Registered Participants section of the web page, and send out the invitation email(s) if you have sufficient assessment inventory.
- If you have sufficient inventory to fulfill all of the registrations, the invitation(s) will be sent to your participants. This will use an assessment in your virtual inventory from the oldest sales order on your account (even if all that is available is inventory put in soft reserve because of another registration).
- If you do not have sufficient inventory to fulfill all of the registrations, the system will alert you with a popup message. Upon clicking OK, you will be returned to the Register Participant page. If you have insufficient inventory but still wish to send some invitations out, you can Register all of the new participants, and then use the Send/Resend Invitations button to send invitations to only the number of participants for which you have inventory.

