
 2163
2163
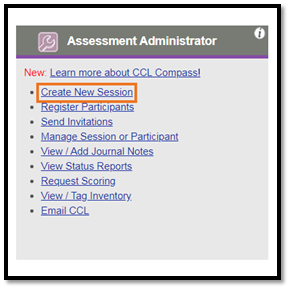
1. Log into IAS and locate the Create a Session option in your Assessment Administrator menu
2. From this screen you configure details of your session. Note that only three of these fields are required to create a session.
- Enter the title you want to give this session
- Select the assessment you wish to use from the drop down menu
- Enter a date you want your participants to have their work completed by. There are no consequences for missing this date, but it will allow you to communicate a deadline to the participant through the system generated communications.
- Enter up to three dates you would like to have system generated reminder emails sent out to the participants. This step is not necessary, but can often help ensure participants complete their work on time.
- Once you are ready, click the Create Session button to continue.

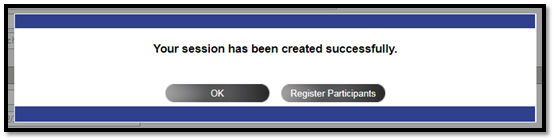
3. Select Register Participants in the dialog popup
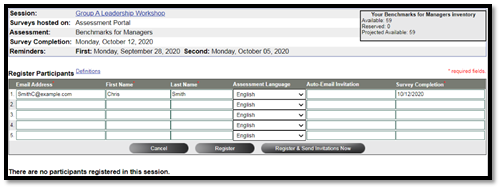
4. At the top of the Register Participants screen you will see the details of the session you just created. To the right you will also see the available inventory you have for the given assessment. Below that is the form where you enter the participants you want to send an invitation to. This form only has five entries, but if you need to register more than that simply register the first five and you will be able to enter five more afterwards. Enter their email address, first name, and last name. If your participant will be taking their assessment in a language other than English select it from the drop-down menu. If you want to register the participants now and have the invitation email sent later you can enter the date in the Auto-Email Invitation field, otherwise you can leave it blank.
Now you can choose to register the participant and send their invitation email immediately, or simply register them and wait to send the email later. In this example we will send the invitations now.
5. A pop-up dialogue will ask you to confirm the participants you are about to register. This is a good time to quickly review the email addresses and make sure they are all correct.

6. After you confirm the registration you will see new information at the bottom of the screen. All registered participants will be shown here, along with the date their invitation was sent, whether it was a manual or automated invitation, and the order number the assessments were drawn from. IAS will automatically select the oldest inventory available, so unless you want certain participants to use inventory from specific orders you can ignore this.
This is also where you can manually send out an invitation for a registered participant if you have not done so already. If you have sent an invitation and the participant cannot find it, you will also be able to resend an inviation. Simply check the boxes to the left for the desired participants and click the Send/Resend Invitations Now button.

Now you are done with the registration process. At this point we recommend checking in with your participants to see if they have received the invitation email. You can monitor the progress of your participants in the Status Report.

